Thursday, December 3, 2009

A-Smashing-Chicken-Potato-Tomato-Bake

PC040134.height=
Simple pleasures are best, right? Well, dinner tonight was simple, so I guess that's why it was also the best one I've had in quiet awhile. I made an improvised winter version of a Jamie Oliver recipe for chicken thighs. Seasonal swaps included - summery cherry tomatoes for good quality canned Italian ones, and fresh oregano for some rosemary. I made do with skinless chicken this time, although the alternative would have been much better since the recipe called for frying the chicken until three-quarters of the way cooked first. I missed out on crispy skin, but this extra step (rather than just throwing it all in a pan to bake) was such a great idea that I got a good sear on mine and it still turned out delicious. This one's a keeper folks.

A word about chicken. Chicken thighs are the best part of the chicken. I think if you have to choose one part to cook, that's the one you should go with, it's hard to mess up really. It's white meat's, more juicy cousin. The expression, "juicy thighs" must have it's origin from a man who knew his way around a chicken. (Ok, I may have just grossed myself out there, but maybe now you'll remember it). I didn't even realize I really liked chicken until I made the switch to using dark meat after eating one too many chicken strips in salad that tasted no better than styrofoam popcorn.

The genius of this simple recipe is that it is cooked in separate parts almost completely, and then bakes together with a vinaigrette poured over for flavor. The result is crispier chicken and perfect roasted potatoes. It was hearty but not heavy. I finished it with a dash of balsamic vinegar right before I served it because I just love balsamic and rosemary together. It was a success despite the substitutions. This rustic chicken bake is a simple pleasure you should try, but would you mind coming over and doing my dishes for me first? That would be lovely.

Chicken Potato Tomato Bake
Adapted from Jamie at Home, by Jamie Oliver.

1 lb. small potatoes (new potatoes, red potatoes, whatever is in season)
6 boneless chicken thighs, preferably free-range, antibiotic free chicken
Olive oil
1 14oz. can of diced or whole tomatoes, drained of juices
Fresh rosemary, a few sprigs
Red wine vinegar and balsamic vinegar

Scrub the potatoes and put them to cook in a pot of boiling, salted water.
Preheat oven to 400 degrees Fahrenheit.

Clean chicken and cut each thigh into 2-3 pieces. Put in a bowl and toss to coat with a few tablespoons of olive oil and kosher salt and freshly ground pepper. Heat a heavy oven safe skillet and fry chicken, skin side down until almost cooked, about three quarters of the way done. You may need to do this in batches. Don't move the chicken or flip it or you'll lose the sear.

When potatoes are fork-tender, drain and place in a bowl. Lightly smash each one with a fork. Set aside. Drain tomatoes and set aside.

Make the vinaigrette either in a mortar and pestle or finely chop the rosemary and muddle with about 3 tablespoons of olive oil and 1 tablespoon of the red wine vinegar, and pepper.

Once all the chicken is cooked, place it all back in the pan with the potatoes and tomatoes tucked in around it. Pour the vinaigrette over the pan and bake in oven for about 25 minutes, or until chicken is no longer pink. Before serving, splash a bit of balsamic vinegar over the dish.


Friday, November 20, 2009

Peanut-Sesame-Soba-Noodle-Salad


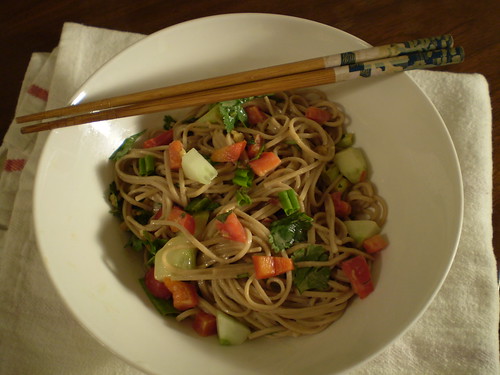
Cold sesame noodles are ubiquitous on Chinese take-out menus but I've never been a huge fan. The cold sticky sloppy mess of noodle just never appealed to me as much as other options. Then one day I was looking around for something to do with soba noodles (Japanese buckwheat noodles, if you're not familiar with them). They are one of my favorite healthy go-to staples in the pantry and what reminded me this would be a good submission for Fight Back Fridays. Soba are often served in noodle soups, or served cold with a dipping sauce. That is what gave me the idea for this dish. A noodle salad that I could whip up for work week lunches, as well as a light dinner that would be more substantial than a green salad. The items that you add in can be altered to suit your preferences or what's in your fridge that night.

A quick dressing of creamy peanut butter (all-natural of course), soy sauce, sesame oil, ginger, garlic and honey are blended together to make the dish. I think the peanut-sesame combo is the key here. Peanut-sauce is often too much peanut-butter flavor with nothing else. Here, when mixed with the soy sauce and enough heat (from red pepper flakes or sriracha) it is more balanced and, frankly more interesting than the one-note flavor it has on its own.

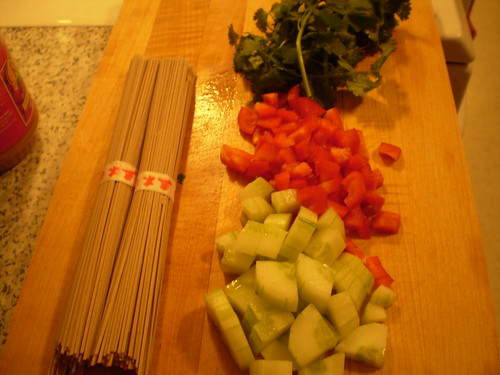
The only add-ins to this salad I strongly suggest be included are chopped scallions and cilantro, to keep with a South-Asian flair. These flavors just work together and brighten up the peanut-flavored sauce. The rest is up to you.

Make a batch of this to have on hand during a hectic week of pre-Thanksgiving cooking madness. As long as the dressing is made, you only have to take the 3 minutes to boil the soba noodles to pull it all together. Save yourself from greasy take-out in the weeks leading up to Thanksgiving. Or, take this for lunch the week after, because there are only so many leftover turkey sandwiches that any person should have to endure.

Peanut Sesame Soba Noodle Salad
Adapted from Recipezaar. Do not dress the noodles too far in advance or they may get a bit soggy.

For the dressing:
1/2 cup smooth all-natural peanut butter
1/4 cup soy sauce
1/3 cup warm water
2 tablespoons peeled fresh ginger, chopped
1-2 teaspoons fresh minced garlic
2 tablespoons rice wine vinegar1 1/2 tablespoons sesame oil
3 teaspoons honey
1/2 teaspoon crushed chili pepper flakes or sriracha

For the salad:
1/2 package soba noodles, cooked and rinsed under cold water
3 scallions, chopped (green and white parts)
1 red bell pepper, seeded and cut into thick strips
1/2 cucumber, seeded and chopped
1 large handful of cilantro

Using a blender puree all the dressing ingredients until smooth (about 2 minutes). Alternatively, whisk all ingredients until they appear well combined.

Cook the soba in a large pot of boiling salted water until tender about 2-3 minutes; drain and rinse well under cold water to stop the cooking. Transfer to a large bowl, then add in the remaining salad ingredients.

Just before serving pour the dressing over the cooked pasta and veggies. Toss well to combine.

Sunday, November 15, 2009

Testing-New-Thanksgiving-Desserts-Fig-Crostata

PB140051.JPG
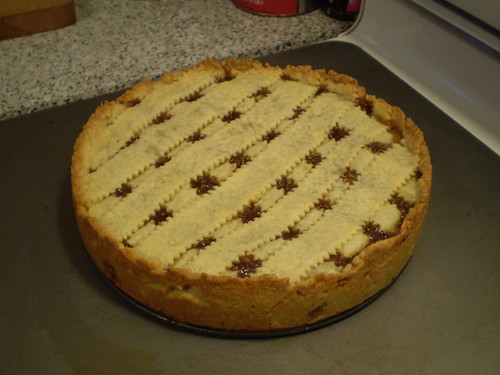
I'm a sucker for a pretty package, so when I saw the photo of the crumbly, flaky, lattice-topped fig crostata in November's Gourmet magazine, I instantly wanted to make it. I thought finding a new option for the dessert table on Thanksgiving could be a good idea. Then I remembered I come from a family of non-adventurous eaters, and die-hard traditionalists. It's apple or pumpkin or nothing. I figured that should not hold me back. I could bake this a week early, and find out for myself if it was as delicious tasting as it was attractive. Maybe it would be worth trying to convince my dining companions this Thanksgiving to give something new a try.
PB140029.<span class=
A crostata is an Italian form of pie made of a shortcake cookie-type of dough. It has as many variations and the internet is filled with recipes where a crostata dough is used as a free-form crust where the sides are folded around the filing, similar to a French galette.
PB140041.<span class=
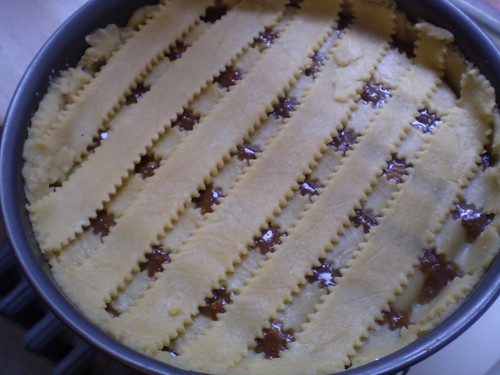
This recipe is made in a springform pan, where the crumbly dough is rolled out and simply pressed into the pan and up the sides. That's easy enough. The lattice-top is a bit more involved. I'll admit anytime I've tried to make a lattice-topped pie crust it ends with a lot of cursing and frustration as my strips soften and fall apart as I try to place them on top. Inevitably I often throw my hands up in defeat and roll the whole mess into one big ball and try for a normal pie crust. But, I finally have figured out that the freezer is my friend and I can fix this problem by popping the strips into the freezer to flash chill if they get difficult to work with. This trick saved the day and made the intricate, impressive looking top easy enough for even novice bakers.
PB140045.<span class=
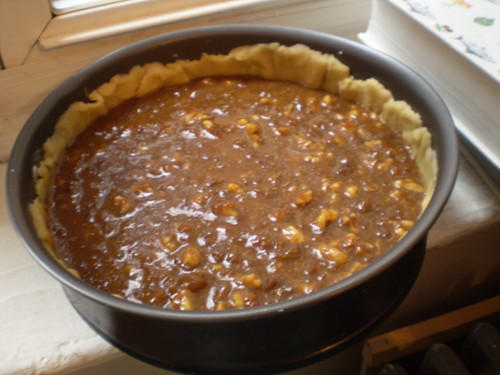
The filling smelled incredible while cooking and filled the kitchen with those warm spice aromas that we associate with the holidays. I'm sad to say that when it was all pureed and baked it tasted like an orange flavored fig newton. It was tasty, but the similarity to a fig cookie made it not that desirable as a holiday dessert. On the other hand, it also made it seem healthier than a pie and I ate it for breakfast today.

My official taste-test verdict? If you're a fig enthusiast, this pie is worth a try. But be prepared for the harsh reality that like me, you find that you are more like your family than you care to admit, and realize that it ain't turkey day without a pumpkin pie.
PB140060.<span class=
Fig Crostata
Recipe from Gourmet Magazine, November 2009

For Pastry Dough
2 cups all-purpose flour
1/4 cup granulated sugar
1/2 tsp salt
1 1/2 sticks cold unsalted butter, cut into 1/2-inch cubes
2 large egg yolks
1 tsp vanilla extract
1 Tbsp cold water

For Fig Filling
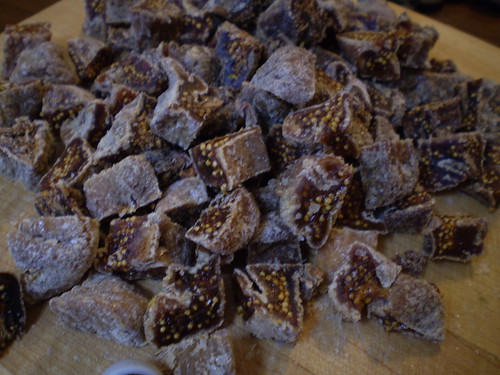
12 oz soft dried figs, stemmed and coarsely chopped
1 1/4 cups water
1 cup fresh orange juice
1/2 cup packed dark brown sugar
1 stick unsalted butter, melted and cooled
3 large eggs, lightly beaten
1 tsp vanilla extract
1 tsp grated orange zest
1 1/2 cups walnuts, coarsely chopped

To make the dough:
Blend together flour, sugar, salt and butter in a food processor just until mixture resembles coarse meal with some roughly pea-size butter lumps (alternatively do this in a bowl with your fingers). Add yolks, vanilla and water and pulse until incorporated and dough begins to form large clumps. Turn dough onto a lightly floured surface and divide into 4 portions. With heel of your hand, smear each portion once or twice in a forward motion to help distribute fat. Gather all dough together then divide dough in half and form each half into a 5-6 inch disk. Chill, wrapped in plastic warp, until firm at least 1 hour, or up to 3 days.

To make filling:
Simmer figs, water, orange juice, and brown sugar in a medium saucepan, covered, stirring occasionally, until figs are soft and mixture is reduced to about 2 cups, 15 to 20 minutes. Pulse in a food processor until finely chopped (mixture should not be smooth). Transfer to a large bowl and cool slightly. Stir in butter, eggs, vanilla, zest and walnuts.

To make tart shell:
Butter a 9-inch springform pan. Roll out 1 portion of dough between 2 sheets of parchment paper into a 12-inch round (dough will be soft; chill or freeze briefly if it becomes difficult to work with). Peel off top sheet of parchment and carefully invert dough into pan. (Dough will tear easily but can be patched together with your fingers). Press dough onto bottom and 1 inch up side of pan, then trim excess. Chill tart shell until ready to assemble.

Roll out remaining dough between parchment into 12-inch round. Peel off top sheet of parchment, then cut dough into 10 (1-inch wide) strips and slide (still on parchment) onto a tray. Chill until firm, about 10 minutes.

Assemble crostata:
Spread fig filling in shell. Arrange 5 strips of dough 1 inch apart on filling. Arrange remaining 5 strips 1 inch apart across first strips to form a lattice. Trim edges of strips flush with edge of shell. Sprinkle top with sugar.

Preheat oven to 350 degrees Fahrenheit. Bake until filling is slightly puffed and pastry is pale golden, about 30 minutes. Cool completely, then remove side of pan. Gourmet suggests you serve crostata with mascarpone.


Saturday, November 7, 2009

Curry-in-a-hurry-squash-soup


I don't have many recipes that I make over and over again, preferring rather to keep experimenting and trying new dishes. There are so many delicious things to eat it's hard for me to keep eating the same old things. Sometimes. This soup is one of the few exceptions to that rule. It's been in my repertoire since I started cooking post-college. It's incredibly versatile, healthy, quick and economical. It can be eaten hot or cold. It can be made with summer or winter squash. What more do you want from a recipe? Not much. You can see why even if I wanted to move on from this soup and leave it in the past, it would be difficult.

The original recipe, that I often make without much variation to it came from a short-lived but much beloved food magazine, Taste. It was an oversized glossy filled with beautiful photos of gorgeous places and foods around the world published by Williams-Sonoma . That was the first time I mourned a magazines demise. Gourmet was the second (cue the heavy sigh).

Zucchini-curry soup as the recipe called for was served cold and as a first course. My version of zucchini-curry soup is served hot over rice (of any type) and as a one-dish meal, perfect for lunch or a light dinner. This has been my go-to meal for many, many years. In fact, I spent one week of being unemployed years ago eating this for lunch and dinner in its various forms, hot and cold, with rice and without. It didn't let me down. I have even seen the recipe re-purposed in a Williams-Sonoma soup cookbook, where it was prepared with fresh oregano in place of the curry. I like curry way too much to bother switching it out, but I assume it's safe to try other spices if curry isn't your thing.

Now that it is November, winter squash is more likely what you may have on hand, instead of zucchini (which is what I had this weekend). I think any type of squash and curry are a natural pairing. To keep the soup seasonal, merely roast winter squash (acorn or butternut perhaps) for an added layer of flavor rather than cooking it in the stock, and then mix with the rest of the ingredients before pureeing. Now you have a basic blueprint for a squash soup than can be adapted into a Spring-Summer soup, or an Autumn-Winter soup and that's all the reason you need to make this soup over and over again.


Zucchini Curry Soup
Adapted from Taste magazine.

1 large onion, cut in half and sliced thin
2 tablespoons, olive oil
2 teaspoons, curry powder (I use Madras-style curry)
pinch of sea salt or kosher salt
4 zucchini, sliced into thin rounds (or about 2 winter squash)
4 cups, chicken stock (although vegetable would be fine too)
plain yogurt for garnishing

In a large pot, combine onion, olive oil, curry powder and salt. Stir over low-medium heat until onions soften, about 3 minutes.

Add stock and zucchini. Cover and simmer for about 20 minutes, stirring occasionally, until vegetables are softened. (If using winter squash, roast them first at about 400 degrees Fahrenheit for 40 minutes with a little olive oil, scoop out flesh and add to put of onions and stock instead of this step.)

Puree vegetables and stock with an immersion blender or in a regular blender in batches, until it is a smooth texture. Add salt and pepper to taste. Serve with a dollop of yogurt on top.

Friday, August 7, 2009

Peach and Blackberry Cobbler for Dessert Corps


I finally found some time to bake for Dessert Corps again this week. I really do love doing it, even if it's very hard not to take a taste of the finished product. I'm also considering this post as my contribution for Fight Back Fridays, because allowing the soup kitchen to serve homemade desserts rather than the food "product" alternatives is food justice in action. Sometimes I think about doing a quality control, but in the end self-control kicks in and I choose not to hand over a dish with a piece missing, but boy oh boy it was hard this week.
P8050185.JPG
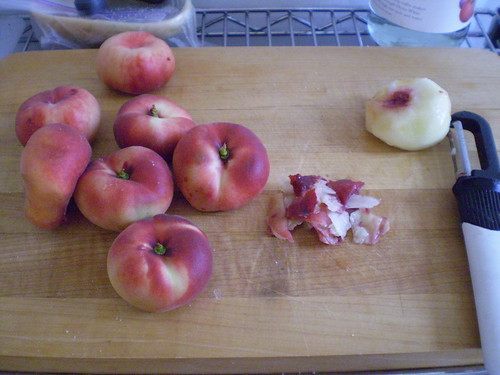
The local CSAs donate some of their extra fruit during the summer months to the soup kitchen, so I didn't pick my fruit, it picked me. I kind of like the surprise element to it all. This week they had some extra doughnut peaches (also known as Saturn peaches or pan tao peaches) and blackberries. Doughnut peaches are a very sweet heirloom variety of a peach that are delicious. They are also less acidic than the larger more common variety of peaches. I set out to think about what to do with these star ingredients. I love the combo of blackberries and cornmeal but wanted to make a one-dish dessert that would be easy to serve, so that ruled out making a blackberry sauce. I also wanted to utilize all the fruit so it didn't go to waste. I was leaning towards a cobbler but I wasn't super excited about it. Then I found a recipe for a cobbler that incorporated cornmeal into the biscuit topping. Indecision ended there. Blackberries and cornmeal baked goods (think pancakes) are a natural pairing. That matched with the sweetness of the peaches would be excellent.

Cobblers are a pretty simple dessert to make and don't require any stand mixers or fancy equipment. I have always loved old-fashioned American style desserts despite their humble techniques and plain Jane appearances. There is something so comforting to me about being able to whip up a dessert with not more than a bowl and a wooden spoon (dream bubble pops above my head to my creepy 1950's sitcom fantasy of me and one of those frilly half-aprons setting out a pie to cool in my window). Back to reality and East Williamsburg. Regardless, a cobbler dough is a cinch to put together all in one bowl. It is a type of biscuit dough and as soon as you mix the wet ingredients into the dry ones you can smell that doughy goodness. Set that aside while you prep the fruit.

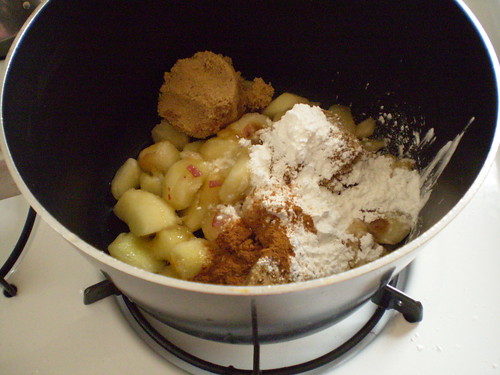
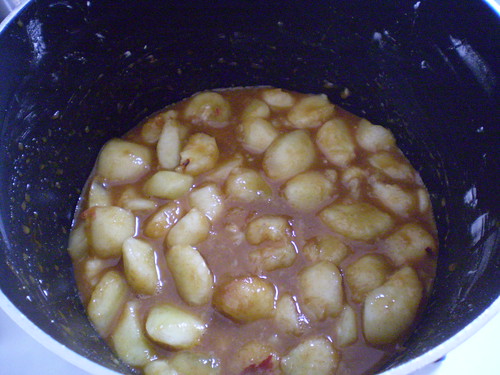
Peel and dice your fruit, peaches in this case, and mix in a pot with a thickening agent, in this case cornstarch and some sort of sugar, a bit of lemon juice, cinnamon and a pinch of salt. Mix together and let cook for a mere five minutes. You're fruit mixture will be transformed what looks like and smells like the inside of a slice of warm pie. Yum. I think I might consider using less sugar next time, because I was concerned that the amount used in this recipe might mask the natural flavor of the peaches. But, being that this recipe was Southern in origin, I just went with it.


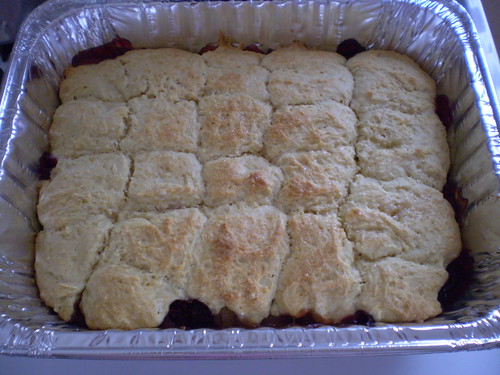
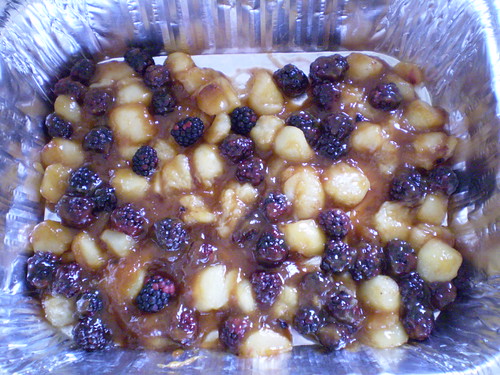
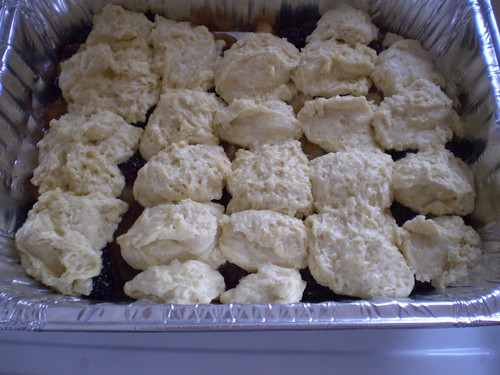
After the peaches are cooked all that is left is to assemble the cobbler. Mix the berries into the peach mixture, very carefully. Then pour into a greased baking dish (note the one in the photo is obviously too large, but I couldn't find a smaller disposable size to bring to the soup kitchen) and drop tablespoons of the biscuit dough all over the top of the fruit mixture. Maybe it's just because I didn't actually get to have a dish for myself but I can still smell how delicious it was, a mix of aromas of warm peach pie and freshly baked biscuits. Incredible, really. I just hope that it the diners thought it tasted as good as I thought it smelled.

Peach and Blackberry Cobbler
Adapted from Epicurious and Down Home with the Neelys. If you do decide to make this cobbler write me and let me how it turned out.

For the Biscuit Dough:
2 cups all-purpose flour
1/4 cup cornmeal
1/4 cup sugar
1 tablespoon baking powder
1/2 teaspoon salt
5 tablespoons cold unsalted butter
1 cup whole milk
1 large egg, lightly beaten

For the Filling:
2 pounds fresh peaches, peeled, pitted, and sliced
1 cup brown sugar
2 teaspoons lemon juice
2 tablespoons cornstarch
1/2 teaspoon ground cinnamon
Pinch salt
1 teaspoon pure vanilla extract
2 pints fresh blackberries

To make the biscuit dough - whisk together the flour, cornmeal, 1/4 cup sugar, baking powder, and salt. Cut in the butter until the mixture resembles coarse crumbs (using your hands works well). Using a fork, stir in the milk and egg just to combine.

Preheat the oven to 350°F. Generously butter a 7 × 11-inch baking dish.

To make the filling - take your prepped peaches and place in a saucepan with the brown sugar, lemon juice, cornstarch, cinnamon, and pinch of salt over medium-high heat. Bring the peaches to a boil, stirring frequently (this is an important step otherwise you'll have caramel). Reduce the heat to medium- low and simmer, stirring, until the sauce thickens and the peaches have softened, about 3 minutes. Remove from the heat, and stir in the vanilla and blackberries. Transfer the filling to the baking dish.

To assemble - use 2 tablespoons, one to scoop up batter and the other spoon to push it off the spoon onto the fruit mixture. Drop spoon fulls of batter to cover the fruit evenly. Sprinkle the tops of the biscuits with some granulated sugar, and bake for 25 to 30 minutes, or until the biscuits are golden brown and the filling is bubbly and thick around the edges.

Cool for 10 minutes. Would be great served warm with ice cream.

Monday, August 3, 2009

Zucchini linguine martini bikini Fritters

P7310198.JPG
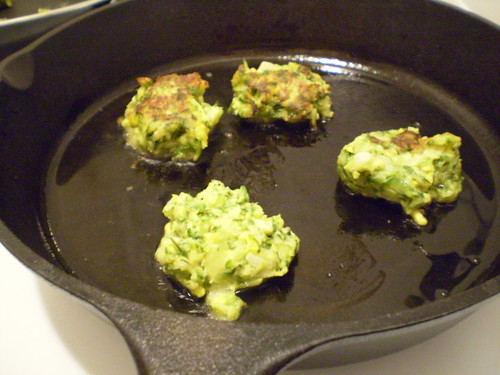
I made zucchini fritters the other night. A fine thing to make to use up some of the mid-summer abundance of squash. While I was standing there with my box grater, grating up zucchini I kept hearing Vince, this hysterically energetic infomercial guy who sells some chopping kitchen gadget. At one point in this particular commercial while he's demonstrating all the things you can grate, he says things like, "fettuccine, linguine, martini, bikini". Hey, what about zucchini, that rhymes too! (This guy has a ton of ridiculous lines one of my favorites being, "stop having a boring tuna, stop having a boring life" that I can't seem to get out of my head, probably cause his commercial is on once a morning while I'm trying to watch for the weather.) Anyways, if you haven't seen Vince in action, it's kind of funny in that infomercial way. Watch it here (localappetite does not endorse the use of this product, only the use of this kind of enthusiasm for cooking).
P7300187.JPG
In case you hadn't guessed by now, I've been on a one-dish kick this summer. It's insanely hot in my kitchen and basically when I have the time to cook, I'm not making entire meals. Something fresh and tasty that utilizes my CSA produce is basically the only thing that has been motivating me this summer. I've just been rounding out the meals with more cheeses, eggs, dips and fruit. It has been a good way to handle eating at home without being in the kitchen for too too long. I was a little hesitant to fry for these fritters. But, Nigel Slater's entry on the same in The Kitchen Diaries had been in the back of my mind for some time. The only essential step to this process is the time to allow the zucchini to sufficiently drain (see photo above) otherwise you'll end up with soggy fritters that will fall apart when you try to cook them.

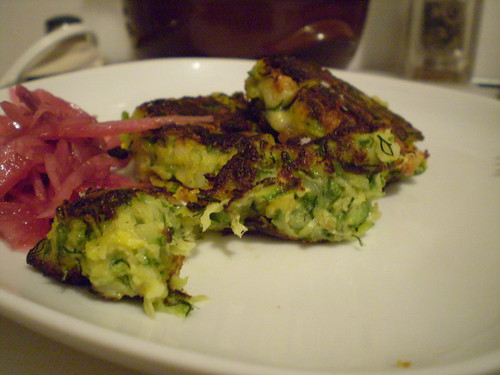
The one surprising thing about this recipe was that it added an extra step, which although I followed, I think I would recommend you omit it. Instead of simply mixing the grated drained zucchini in a bowl with your binders, egg and flour, and then frying, he writes that you should saute it all in a pan first and then add the flour and egg and then make little balls and fry in a second pan. I thought he might be onto something (maybe it added extra flavor or helped to further dry out the squash?), but after cooking the recipe through, I think it was an unnecessary step, leaving you with an extra pan to clean. I wouldn't want to do that to you. Either way you do it, you'll end up with light and moist zucchini fritters, if you don't flatten them too much into more of a pancake shape. As you know zucchini works well with almost anything, but either feta or Parmesan would be interesting. I used dill for the seasoning, but definitely just go with what you like or have on hand. And just like zucchini itself, this dish is versatile and will go with whatever else was on the menu for that night. Or, if you're like me, it's ok to just eat this and save room for dessert. It's too hot to eat a big meal anyways, right?
P7300193.JPG

Zucchini Fritters
Adapted from The Kitchen Diaries, by Nigel Slater

3-4 zucchini, grated
Salt
1 small onion, chopped
1 clove of
garlic, minced
1/2 cup grated cheese, your choice
1 handful of fresh
dill, chopped
1 egg, lightly beaten
2-3 tablespoons all-purpose flour
Olive oil

Coarsely grate zucchini and place in a colander. Salt liberally and allow
to drain for about 30 minutes. When ready to use take handfuls of it and squeeze
out any additional water before placing it in a bowl.

Mix drained zucchini with the rest of the ingredients. It will be a slightly stiff mixture. Heat a heavy pan with enough olive oil for frying. Drop mounded tablespoons into the pan and allow to brown. Keep your eye on them as
the oil gets hotter (they will cook very quick at the end) and take care when
flipping the fritters as they fall apart easily (a spatula and a fork together worked best for me).

Sunday, July 26, 2009

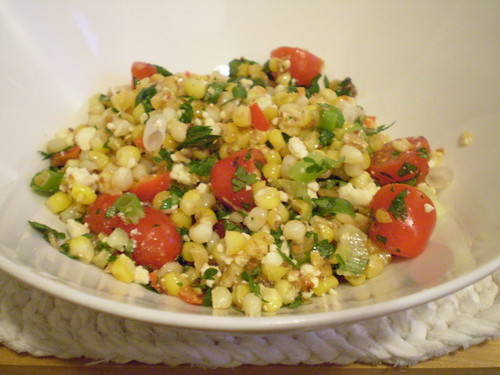
Deconstructed Elote aka My New Favorite Summer Salad


Elote is the Mexican name for grilled corn on the cob smothered with crumbly cheese, lime juice and a bit of cayenne pepper. It is a specialty in the Yucatan peninsula and lucky for me available in various restaurants and flea markets around Brooklyn, if you know where to look. However, if you haven't had one of these, please stop reading and go find one. It truly is one of the best street foods I can think of. It transforms a cob of corn into an explosion of flavor. I would make this treat for myself on a regular basis if I had access to a grill, but since I don't (sob, sob) I used to just wait until I went out for Mexican food to have it. That all changed last night.

I think I'll probably make this little beauty of a salad at least once a week, or as long as I have access to the fresh ingredients. My corn on the cob actually came from my CSA. Now if we could only grow avocados up there...

On the issue of eating locally, I have been thinking a lot about how cooking different cuisines can work with a sustainable cooking philosophy. There are always going to be certain essential ingredients that are not going to be available locally if you're preparing dishes from regions and countries with a different climate. In summer I tend to cook a lot of Mexican or Mediterranean dishes, and things like citrus, or olives, or certain cheeses aren't locally sourced in the Northeast where I'm located (as far as I know). It's in these situations I think there is room for flexibility. The goal is to support sustainable food and food purveyors by voting with your fork, but it is not to suffer in the process. I think eating local is the right thing to do, and if everyone did it there would be a change in our broken food system. But, I also think allowing yourself to purchase things that are unavailable in your region is alright too. Phew. Glad I got that off my chest.

Back to the dish. I got the idea for this salad after reading Mark Bittman's article last week in the NY Times Dining section. It was another one of his mega-lists of quick and genius flavor combinations. If you missed it, go and read it here. I know I'm going to use this list again and again when I'm having a cooking block. It's no coincidence that I picked his idea for deconstructing elote for a corn salad as my first dish. It is perfect for a picnic, or when you don't have access to a grill. Or for someone who just wants to eat with a fork.

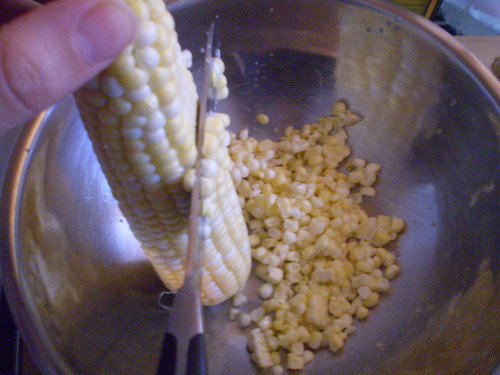
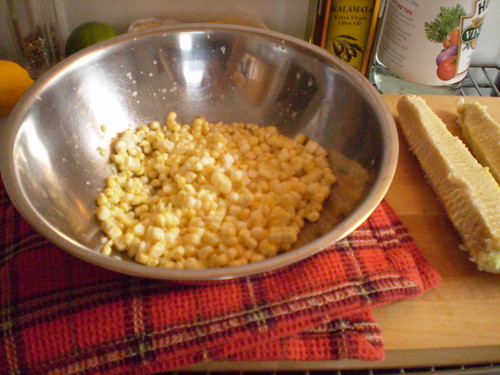
Basically, you take the corn off the cob and quick roast it until it gets a bit brown in a skillet. This will cause a wonderful toasted corn smell to infuse your kitchen. Combine that with the essential components of elote, fresh lime juice, creamy queso fresco, and some heat (either cayenne pepper or chilis) and you have elote in a bowl. I added a few ingredients to plump up the salad, which just made it a bit more into a meal. Once done, take your salad and a cold cerveza onto your fire escape and you can almost pretend you are sitting in a plaza in Mexico as the sun sets. Buen provecho!


Deconstructed Elote Salad
I mixed the leftovers with some cooked shrimp for lunch today. Options are endless.

3 ears of corn
queso fresco (to taste)
fresh lime juice (about 1 big lime or 2 small ones)
1 jalepeƱo, deseeded and minced
cherry tomatoes (about 1/2 cup)
1 scallion, chopped
cilantro (small handful)

Take corn off the cob with a sharp knife. Place in a pan with some olive oil and cook stirring to avoid it sticking, till the kernels have a toasted look to them. Place in a
bowl and mix with the cheese and lime juice. Chop all the other ingredients
you're using and mix together. Easy Peasy.